
Spring Nail Art Tutorial:
Spring came. together with it comes alive and flourishing
nature. we are also a part of this nature. And we, the truthful creatures,
don't want to keep up with her. we wish to be with the approaching of spring
even a lot of charming, lovely, and mysterious. to create our dreams come back
true, to be distinctive, we provide you the design for nails "Spring
Tulip”.
1. Clear nails to cover:
 To do this, take away the previous paint if it was. Provide
the means that to use the makeup that you just that you perpetually in use. We
recommend only that the base, paint and coating were one firm. Brush carefully
plots the basic coverage.
To do this, take away the previous paint if it was. Provide
the means that to use the makeup that you just that you perpetually in use. We
recommend only that the base, paint and coating were one firm. Brush carefully
plots the basic coverage.
2. Nail polish:
.jpg) Cover nail polish bright color (what you used to.) This will be the background of your
picture. We have taken light pink
tone nail polish.
Cover nail polish bright color (what you used to.) This will be the background of your
picture. We have taken light pink
tone nail polish.
3. A drawing:
.png)
Nail polish over a contrasting color to match
what you have chosen to put the picture of tulip, while the first coat of nail
polish is not dry.
4. Creating
the Background:
.jpg)
Cover image matte varnish to match the original.
5. Application of a second pattern:
.jpg) Fine brush to design and paint, water-based paint
outline tulip. We have taken the
black paint. You can take a dark
purple dye on pink lacquer or dark colors to match your nail polish. You can take the black paint to any nail
polish.
Fine brush to design and paint, water-based paint
outline tulip. We have taken the
black paint. You can take a dark
purple dye on pink lacquer or dark colors to match your nail polish. You can take the black paint to any nail
polish.
6. Coloring petals :
.jpg)
Take water-based paint to match your paint and paint
the tulip petals with same brush.
7. The application of gold or silver paint:
.jpg)
At its discretion, apply a flower gold or silver paint,
where you see fit.
8. The final stage:
.jpg) Completed drawing is covered with clear varnish. Your hands are irresistible and so are
you.
Completed drawing is covered with clear varnish. Your hands are irresistible and so are
you.
1. Clear nails to cover:
To do this, take away the previous paint if it was. Provide
the means that to use the makeup that you just that you perpetually in use. We
recommend only that the base, paint and coating were one firm. Brush carefully
plots the basic coverage.
2. Nail polish:
Cover nail polish bright color (what you used to.) This will be the background of your
picture. We have taken light pink
tone nail polish.
3. A drawing:
Nail polish over a contrasting color to match
what you have chosen to put the picture of tulip, while the first coat of nail
polish is not dry.
4. Creating
the Background:
Cover image matte varnish to match the original.
5. Application of a second pattern:
Fine brush to design and paint, water-based paint
outline tulip. We have taken the
black paint. You can take a dark
purple dye on pink lacquer or dark colors to match your nail polish. You can take the black paint to any nail
polish.
6. Coloring petals :
Take water-based paint to match your paint and paint
the tulip petals with same brush.
7. The application of gold or silver paint:
At its discretion, apply a flower gold or silver paint,
where you see fit.
8. The final stage:
Completed drawing is covered with clear varnish. Your hands are irresistible and so are
you.
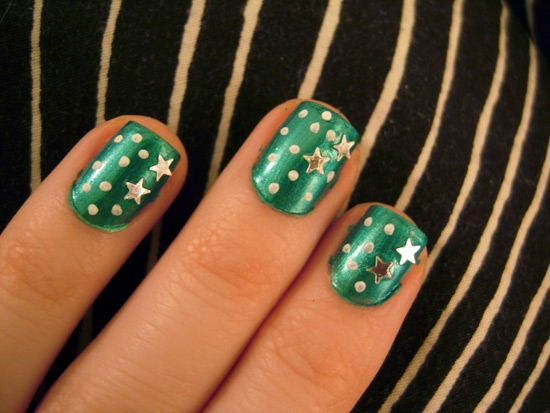
7. The application of gold or silver paint:
At its discretion, apply a flower gold or silver paint,
where you see fit.
8. The final stage:
Completed drawing is covered with clear varnish. Your hands are irresistible and so are
you.

.jpg)
.jpg)
.jpg)
.jpg)
.jpg)

.jpg)


.jpg)


.jpg)
.jpg)